In the second of our blogs on Building a Digital Twin within the ArcGIS Platform, Ben Holmes documents the execution and results of the drone survey performed at our Leeds office. Missed the first part of the series? Check out Part 1 first.
Introduction
I used Pix4Dcapture for planning the flight of a Mavic 2 Pro drone over our Leeds building, which is part of Elmete Hall, and its grounds.
Initially I flew a double grid flight plan at 35m altitude for 3D, as that is what I have used in the past for creating 3D meshes. Later I changed to a circular flight plan at 50m – the reason for this change was that some of the architectural features of the building were being lost due to the less oblique view of the double grid flight.
Survey results
Double grid flight plan:
- 317 captured photos
- 249 enabled for processing
- 35m above take-off point
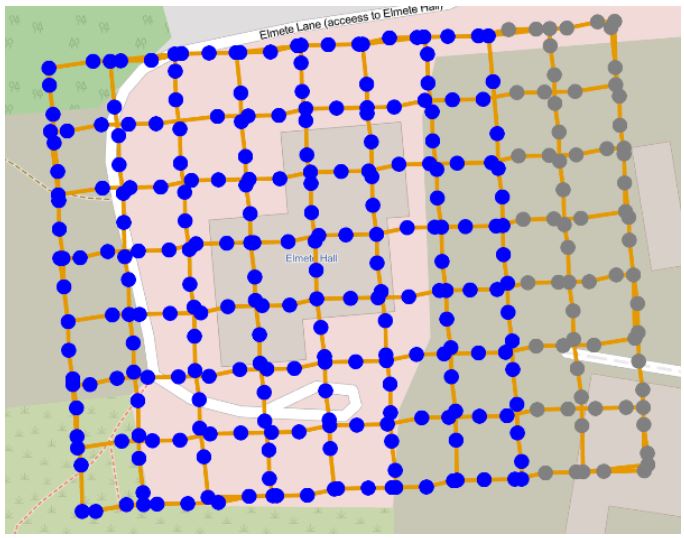
Figure 1 – Double Grid flight plan and photo locations (grey circles indicate photos that weren’t used for processing)
Circular flight plan
- 36 photos captured and used
- 50m above take-off point
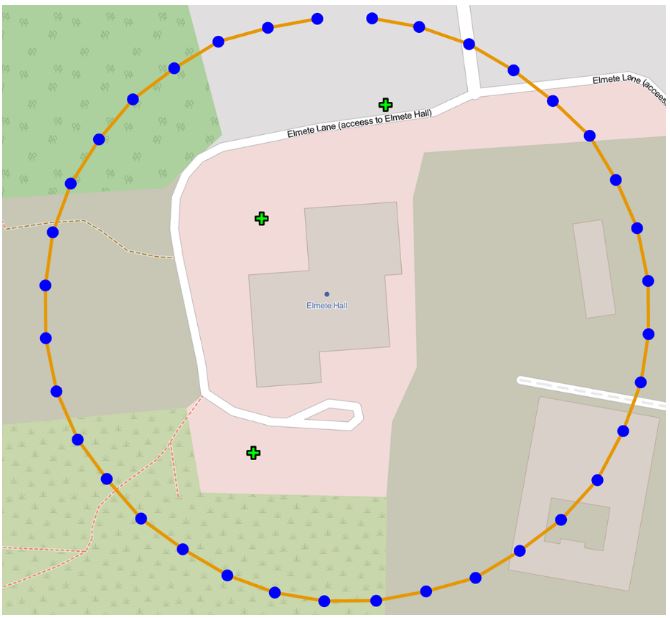
Figure 2 – Circular flight plan and photo locations
Processing
I used Esri’s Drone2Map for ArcGIS, version 2.1, for processing the data, selecting the 3D Mapping project template. I created 2 projects – one for the double grid flight and one for the circular flight. For the samples seen here, the processing was done using the rapid setting for the Initial processing, meaning that the drone photos were processed at ¼ resolution; the rest of the settings were left as their default for the 3D Mapping template. For more on the processing options, see the Esri documentation, here.
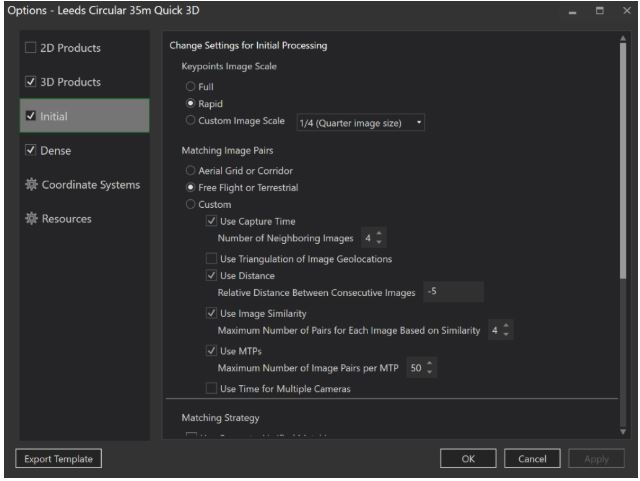
Figure 3 – Drone2Map processing options
We had printed out and laminated some GCP markers, which we’d distributed evenly around the grounds of the office. We collected accurate locations for the centre points of the markers using a Leica GS07 (using NUTM30 on the WGS84 datum, EPSG code 32630). These GCPs were turned into a feature class which I loaded into the Drone2Map project – I then identified the location of each GCP on at least 4 photos.
The output products we decided to create were:
- Point Cloud
- ArcGIS Scene Layer Package Mesh
Using a good laptop (Dell XPS with i7-8750H, 32Gb RAM, NVIDIA GTX 1050 Ti 1Gb), the time to create these products was:
- The double grid plan: 1 hour 40 minutes
- The circular flight plan: 15 minutes
Results
Double grid flight
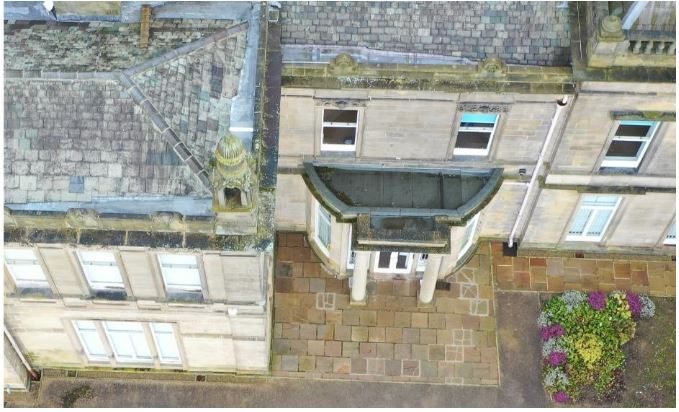
Figure 4 – Extract of Image from Double Grid flight
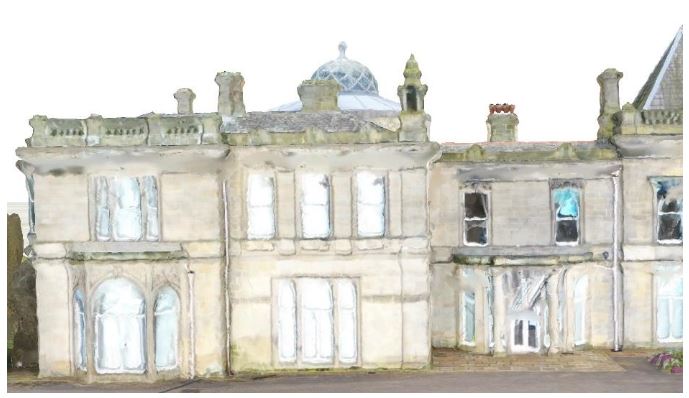
Figure 5– Mesh derived from Double Grid flight
- Issue: note that the main doorway, top of wall and windows have artefacts due to “data shadow”
Circular Flight
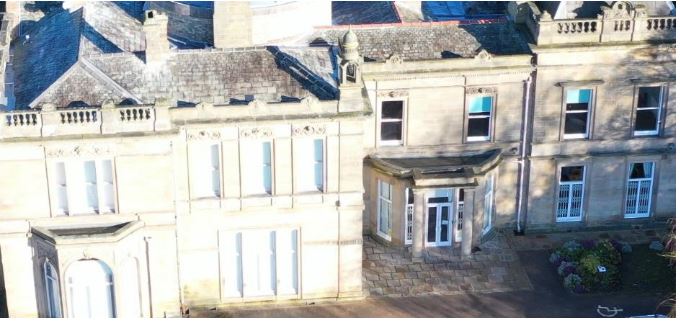
Figure 6– Extract of Image from Circular flight
- Issue: note the areas of shadow and bright sunlight – the survey took place in late February, which was not ideal timing
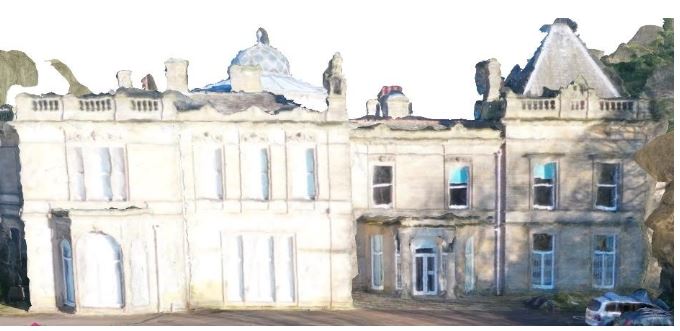
Figure 7– Mesh derived from Circular flight
- The mesh derived from the circular flight gives a better result than the double grid derived mesh for main doorway and top of walls and windows, but the lighting conditions result in a poorer contrast overall
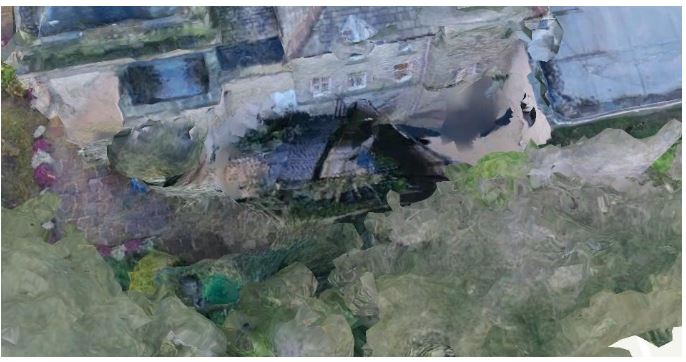
Figure 8– Trees blocked image capture of the side of the building
- Issue: the eastern side of the office is bordered by trees which prevented the drone from capturing imagery for the lower part of the eastern walls, resulting in a poorly defined mesh.
- We did, however, also survey the outside of the building from ground level using the laser scanner, so one of the things we can look at is integrating the two datasets – as well as filling in where drone-derived data is missing, it may support an improvement in the contrast of the external walls.
Sharing the results
ArcGIS Online
We shared the mesh data to ArcGIS Online directly from Drone2Map, so that we could easily access it across the other apps in the ArcGIS Platform.

Figure 9 – Exporting the SLPK Mesh to AGOL from Drone2Map
ArcGIS Pro
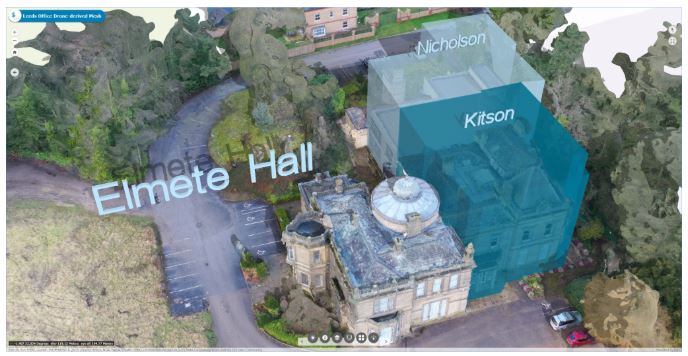
We exported the data for use in ArcGIS Pro, where we created some multi-patch features showing the footprints of our part of the building. We also developed an ArcGIS Pro tool to create 3D labels, and then shared these and the footprints with ArcGIS Online, creating a scene which we then published via this Web Application Builder app (feel free to try it out for yourself!)
Conclusions
With the advent of easy-to-fly drones and software such as Drone2Map, it’s relatively easy to survey and then continuously monitor assets and infrastructure.
The flight times of the surveys in this demonstration varied from 5 to 15 minutes. This means it is possible to iteratively fly a survey and then QC the data via a rapid low resolution process on a laptop, on site.
If the result is not up to expectations, the flight plan can easily be adjusted and further data quickly captured.
Lessons learned:
- For an individual building/structure, a circular flight may prove more effective in creating a 3D model
- The double grid is more useful for creating a model of a larger area and deriving elevation data of that area
- As flight plans can be saved, it is easy to rerun flight missions and build up an archive for change detection
What next?
That’s it for the drone survey process and results of our Digital Twin project – check out the next blog in this series to learn about our laser scanning:
Posted by Ben Holmes, GIS Consultant
