


A lot of video recording devices (dash cams, drones and action cameras such as GoPro) now also record a range of metadata along with the video file, such as spatial information that we can use to locate the video and incorporate it into a Geographic Information System, or GIS.
In this blog series we share an innovation project that looks at using video data captured by a variety of devices within the ArcGIS platform.
In this first blog post we will look at videos from a dash cam device. We will first look at how we extracted the video metadata from the video file, then imported it into the platform as a feature layer using ArcGIS Pro, and published the data as a service so that it could be easily shared across the platform. Finally, we will discuss how we used the recorded speed data from the dash cam along with the spatial information to build a custom GIS application using the Developer edition of Web AppBuilder.
Esri’s technology for doing this is called FMV (‘Full Motion Video’) and, as you’d expect, it is supported across the ArcGIS platform.
What is ‘Full Motion Video’ in the GIS world?
FMV in the GIS world basically means ‘video on maps’. It allows us to use the metadata associated with recorded video files to spatially enable the video frames so that we can visualize them on a map. In this blog we will compare the recorded speed from the dash cam with the speed limit stored in another GIS dataset as the video is playing.
Our dash cam
The dash cam used in this example is a Nextbase 412GW which is relatively cheap. It records a number of attributes along with the coordinates – the full list of metadata is:
- GPS Date/Time
- GPS Latitude
- GPS Longitude
- GPS Altitude
- GPS Speed
- GPS Speed Ref
- GPS Track
- GPS Track Ref
- GPS Dilution Of Precision
- GPS Satellites
The dash cam records all this metadata by default, so no settings had to be changed to enable this. We mounted the dash cam in a car and drove around a local area to record some videos. Once back in our (home) office we simply copied the video files from the memory card on to the computer for further processing.
Extracting the metadata from the video
The metadata from this dash cam is stored in the .MOV file format and we used a handy little tool called ExifTool to extract the metadata to a separate spreadsheet file.
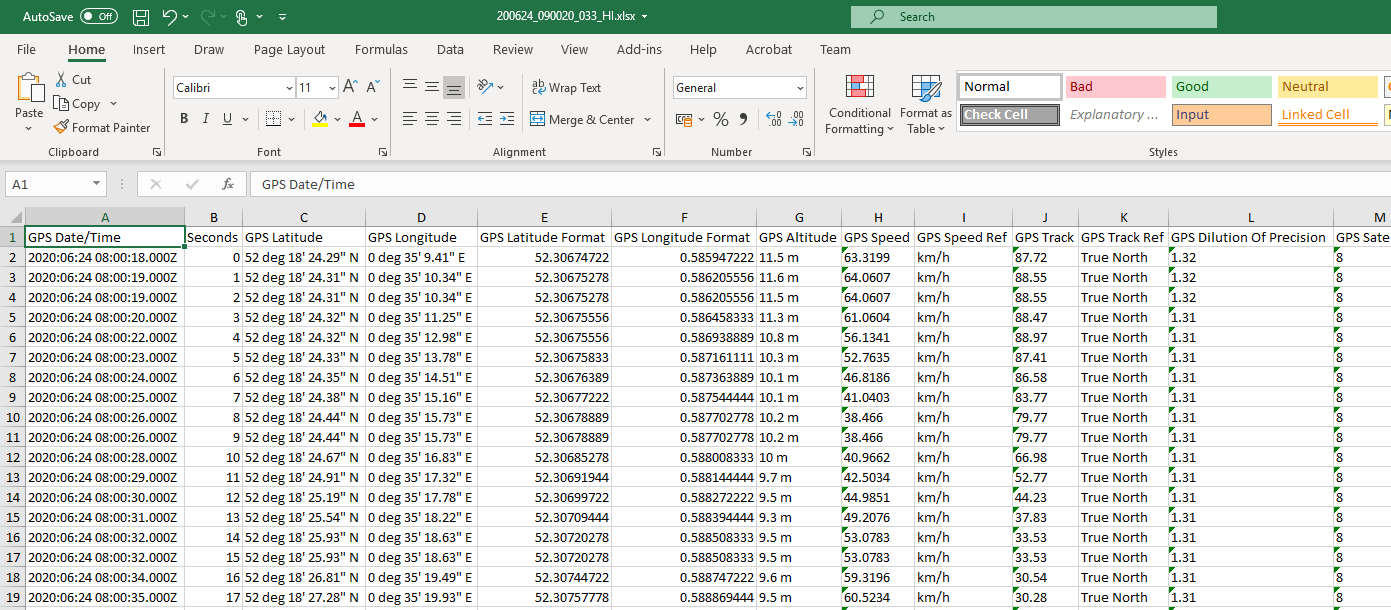
Figure 1 – Metadata exported from the dash cam video
The ExifTool can be used from a command line and here is the syntax we used to export the above spreadsheet:

Figure 2 – The ‘-ee’ parameter exports information from embedded files and the ‘-t’ parameter exports the data in to a tab-delimited format. More information about the options available can be found here
Importing the video metadata to ArcGIS Pro
Once the metadata was in a spreadsheet file we simply imported it to ArcGIS Pro using the out–of–the–box XY Table To Point tool to create a FeatureClass point layer.
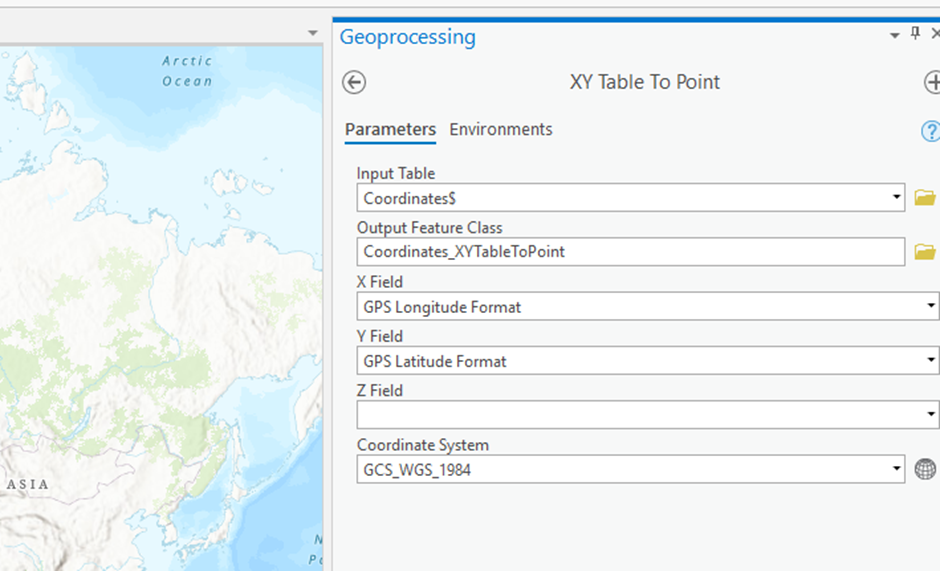
Figure 3 – Spatializing the tabular position data using the ArcGIS Pro ‘XY Table To Point’ tool.
Once the import completed, ArcGIS Pro displayed the point layer on the map so we could visualise the route driven. For each of the points we were able to view the associated metadata, including the speed we were travelling at that time.
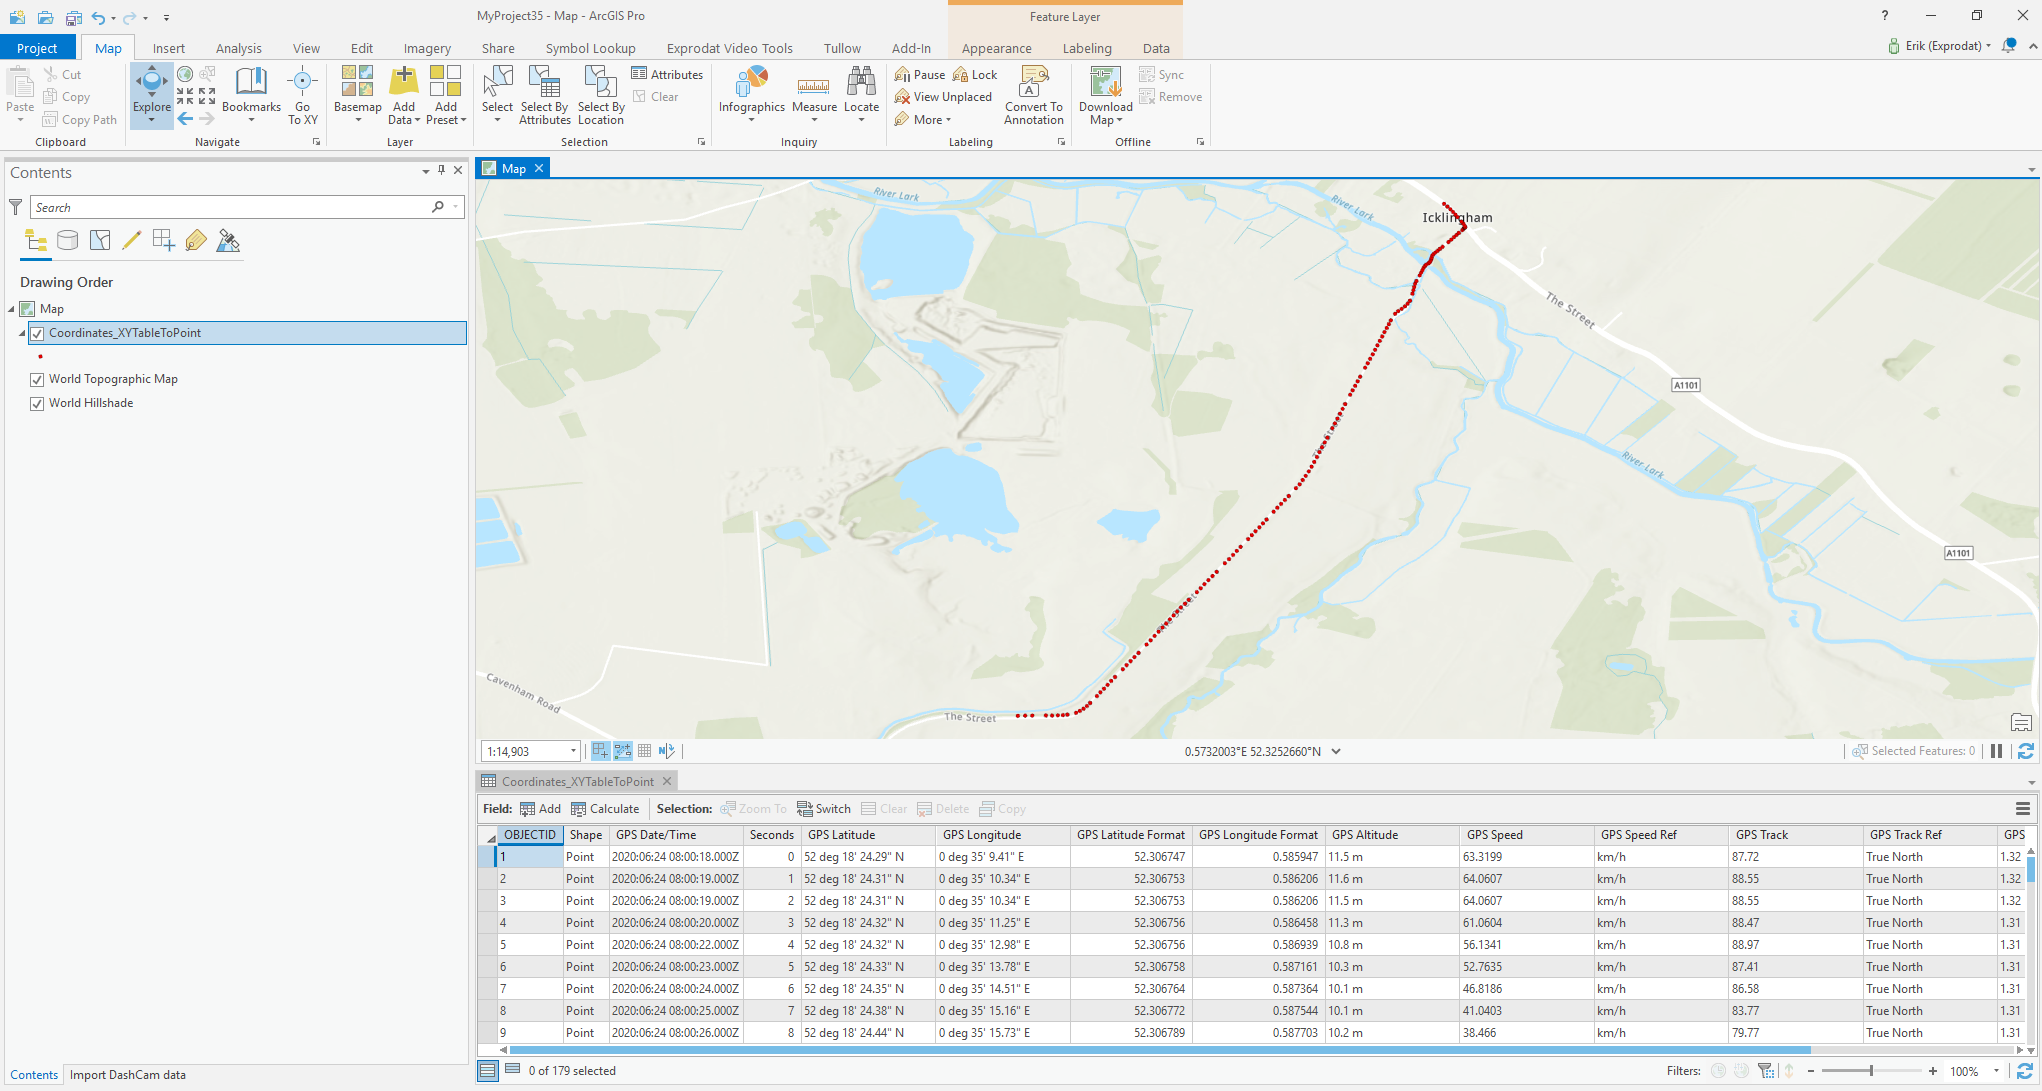
Figure 4 – Video metadata now displayed as point layer in ArcGIS Pro.
The next step in this process was to share this point layer as a Feature Layer with the rest of the ArcGIS platform. We used ArcGIS Online but we could equally have shared with ArcGIS Enterprise. We shared the layer using ArcGIS Pro’s out–of–the–box Share As Web Layer tool.
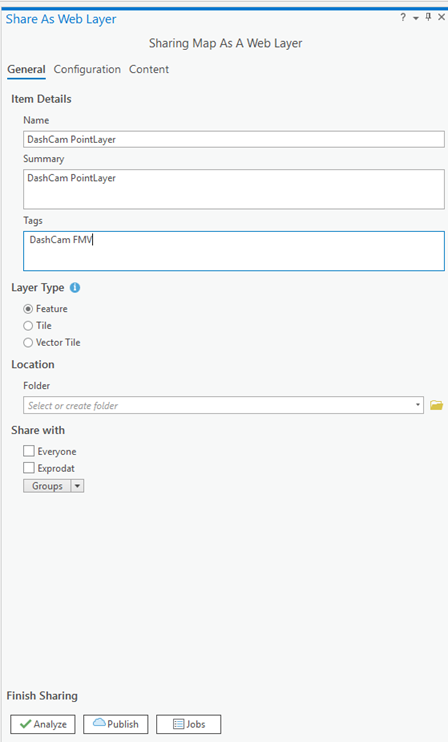
Figure 5 – Sharing the video metadata across the platform as a Feature Layer
Automating the import
As this is a process that is likely to be repeated (as you keep recording new dash cam videos) we decided to automate the previous workflow. We did this by creating an ArcGIS Pro Add-In which executed the workflow in one step:
- User specifies the target folder containing the dash cam videos and clicks the Import button
- The Add-In loop through each video it finds in the folder and:
a. Extracts the metadata
b. Creates the point featureclass
c. Publishes the point featureclass as a Feature Layer to ArcGIS Online
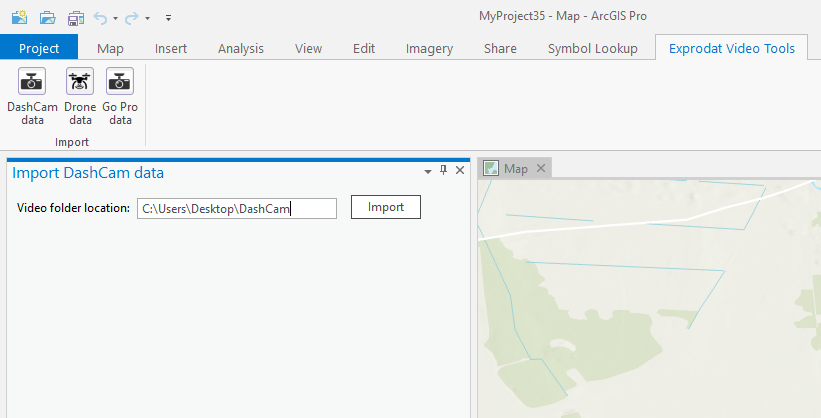
Figure 6 – Custom Add-In created to streamline the data import
This import process could also be scripted so that it can run automatically as new videos are added to a folder.
Visualizing in a web application
Next, we created a new Web AppBuilder application to play the video and display the vehicle location on the map as the video is playing. We used the HTML5 video player to play the video – by listening to the events of this control we tied each video frame to the associated attribute data from our new Feature Layer. The actual video files are stored on a webserver.
To take it one step further we also used one of the other attributes from the dashcam – the speed attribute – so when the video is playing we can compare the recorded speed for each point with the legal speed limit (which comes from a different dataset).
This allowed us to customise the data display in the web app: when the vehicle was driving at (or below) the speed limit the app displays the speed data in a green font together with a green happy smiley icon, but when the vehicle was going faster than the speed limit the app displays the speed data in a red font together with a red sad icon.
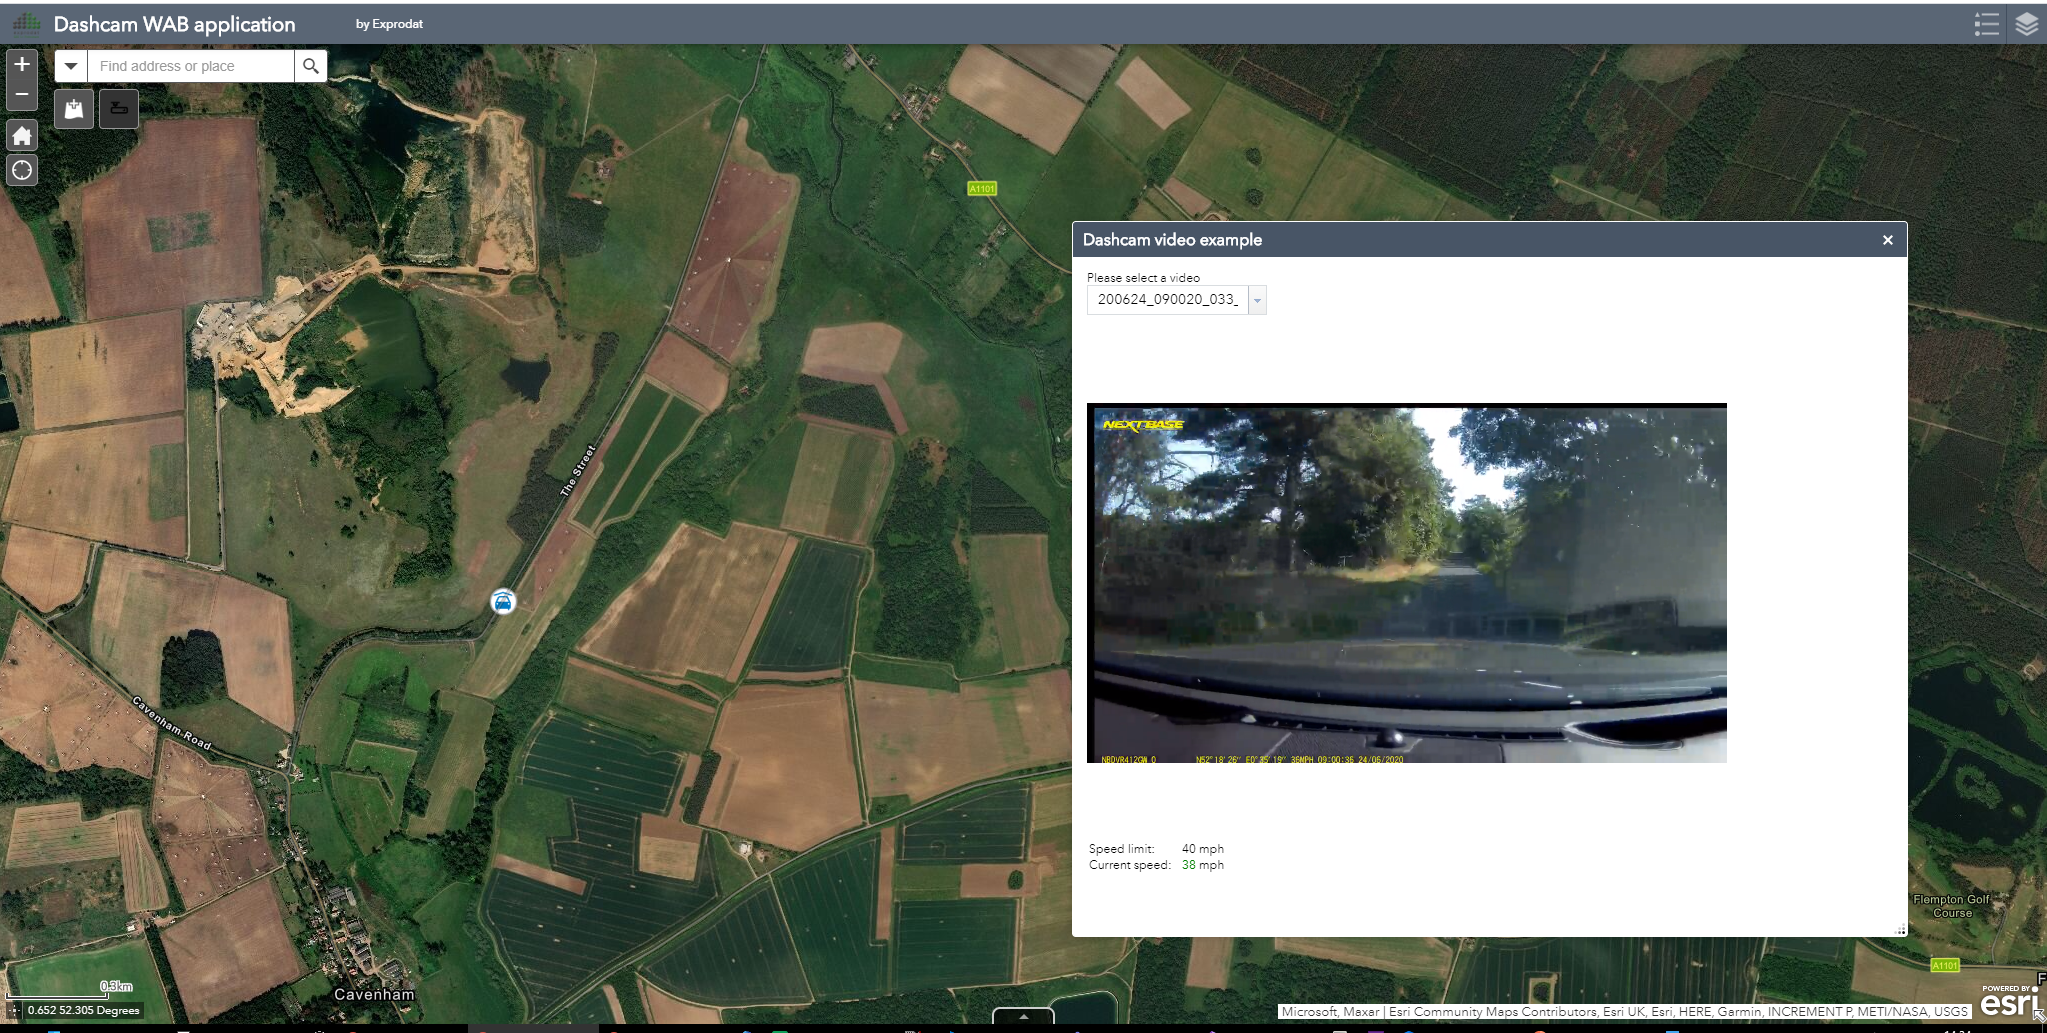
Figure 7 – The Web AppBuilder app
Take a look at the video below to see the app in action:
Conclusion
In this blog we have described how we took videos from a standard dash cam, extracted the metadata information, created GIS layers and shared them across the ArcGIS Platform as services. We also looked at how to automate the process and how to use the data in a custom web app. We have also shown that we are able to highlight the location on the map as the video plays and we used associated data (i.e. speed) from the dash cam in combination with other GIS data.
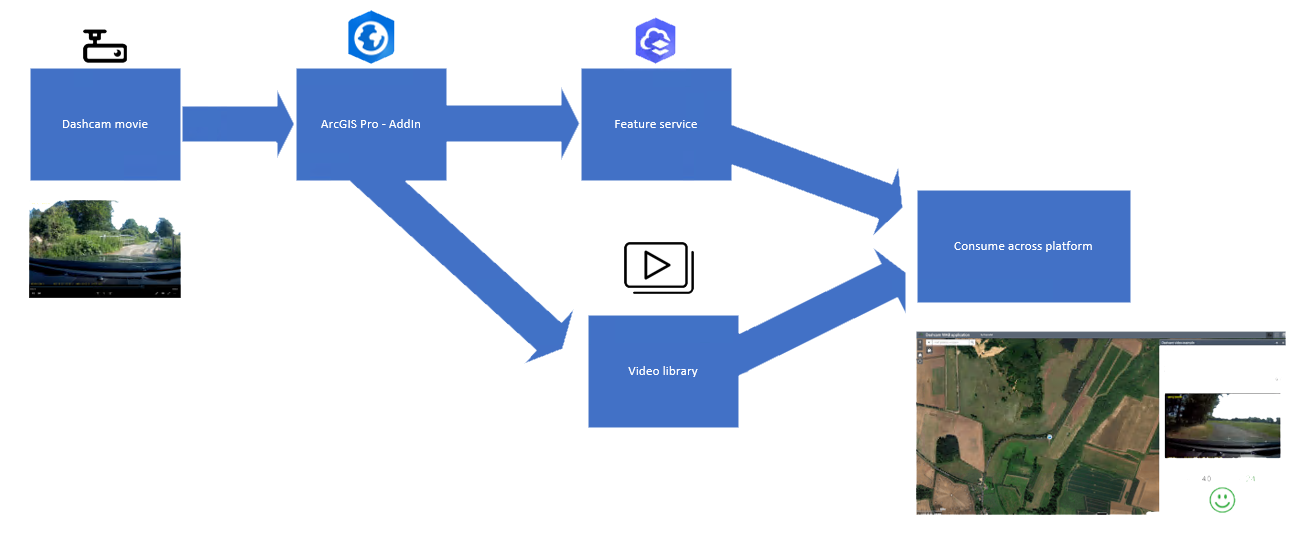
Figure 8 – Schematic showing the video data workflow.
What’s next?
In the next blog in this series we will look at drone videos and how they can be used in the ArcGIS platform – specifically, how we can view multiple videos filmed at the same location at different times.
Posted by Erik Nyberg, Senior GIS Developer.


